There are several ways to tint eyelashes and make them thicker. We use mascara for this task daily, anyone more persistent will reach for eyelash serum or castor oil, you will have to wait for results though. What if you want something more long-lasting than mascara and the fastest possible effect? With henna and lash tint come to the rescue!
Eyelash tinting - powder henna, gel henna, or eyelash tint?
Let's start with what henna actually is. It is made of powdered Lawsonia leaves and is used for tinting eyelashes, hair, and eyebrows. Henna tinting is significantly different from the commonly known hair dyeing, because:
- henna mixed with hydrogen peroxide coats the hair from the outside and gives it a different color, it also thickens the hair and improves its condition,
- dye mixed with oxidizer penetrates the hair and changes its pigment from within permanently.
Eyelash tinting - what does it involve?
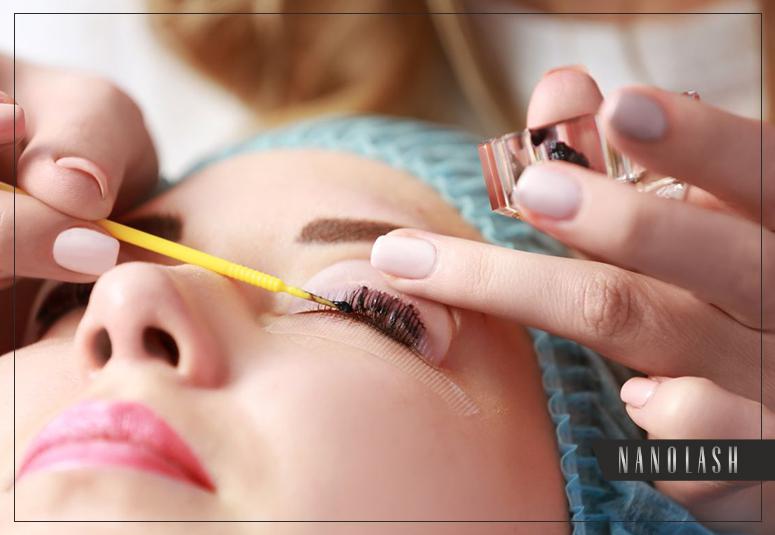
Tinting lashes with henna powder involves using powdered herbs. When they are combined with demineralized water, hydrogen peroxide, or hydrolase like rose water, a paste is formed that tints the hair and skin. When applied on clean hair, it clings firmly to the hair shaft and changes the color. The advantage of henna is that it visually thickens eyelashes or eyebrows, making the hair longer.
Gel henna, on the other hand, is a finished product, also created using natural herbs. However, it may contain additional conditioning or color-enhancing ingredients. In this case, gel henna also coats the hair from the outside and gives the impression of a bigger volume.
Eyelash and eyebrow tints are chemical products. Most often they come in a two-component form - the package contains ammonia and the tint, enclosed in a tube or sachet, as well as oxidizer in a bottle. Tinting with it is definitely more gentle and does not stain the skin, unlike henna. It does not thicken the hair in any way and is most often used during eyelash lift and lamination treatments to boost their effects and darken the lashes.
Tinting eyelashes at home
Using eyelash henna at home is incredibly easy and inexpensive. You can easily find powder henna, gel henna, and eyelash tints in online stores and regular drugstores at very affordable prices. All products are available in different colors (black, dark brown, light brown, red, etc.), so you can match them to your features. The products are most often suitable for tinting both eyelashes and eyebrows, so we can tint both at once.
How to prepare for tinting eyelashes at home?
Before tinting your lashes, it is worth taking a few simple steps, namely:
- Before applying the henna or tint, prepare them, following the instructions, and clean your eyelashes well. It's a good idea to remove your makeup thoroughly and clean your lashes with an eyelash and eyebrow shampoo which will give you one hundred percent certainty your lashes are free of oil and any impurities.
Tip: If you're going to use henna to tint your eyebrows as well, it's a good idea to do a fine-grained scrub of your arches beforehand. This will get rid of dead skin and create the perfect base for the henna to cling to the skin better.
- It is important to protect the skin around the eyes, including the eyelids. Henna leaves residue on the skin, which is useful when tinting eyebrows, but it's not the same with eyelashes. You can use Vaseline or an oily cream for this.
- Henna and dyes are applied directly to the eyelashes. You can do this without additional protection but we recommend using cotton pads for this task. Just wet them well and place them on the lower eyelid. This will protect the skin and make it much easier to apply the henna over the lashes.
How to tint your eyelashes by yourself, step by step?
Doing eyelash henna by yourself is easy. If prepped your eyelashes or eyebrows following the previously mentioned steps, you can start right away. We recommend doing eyelash henna first on one eye and then on the other if you don't have someone to help you with the treatment.
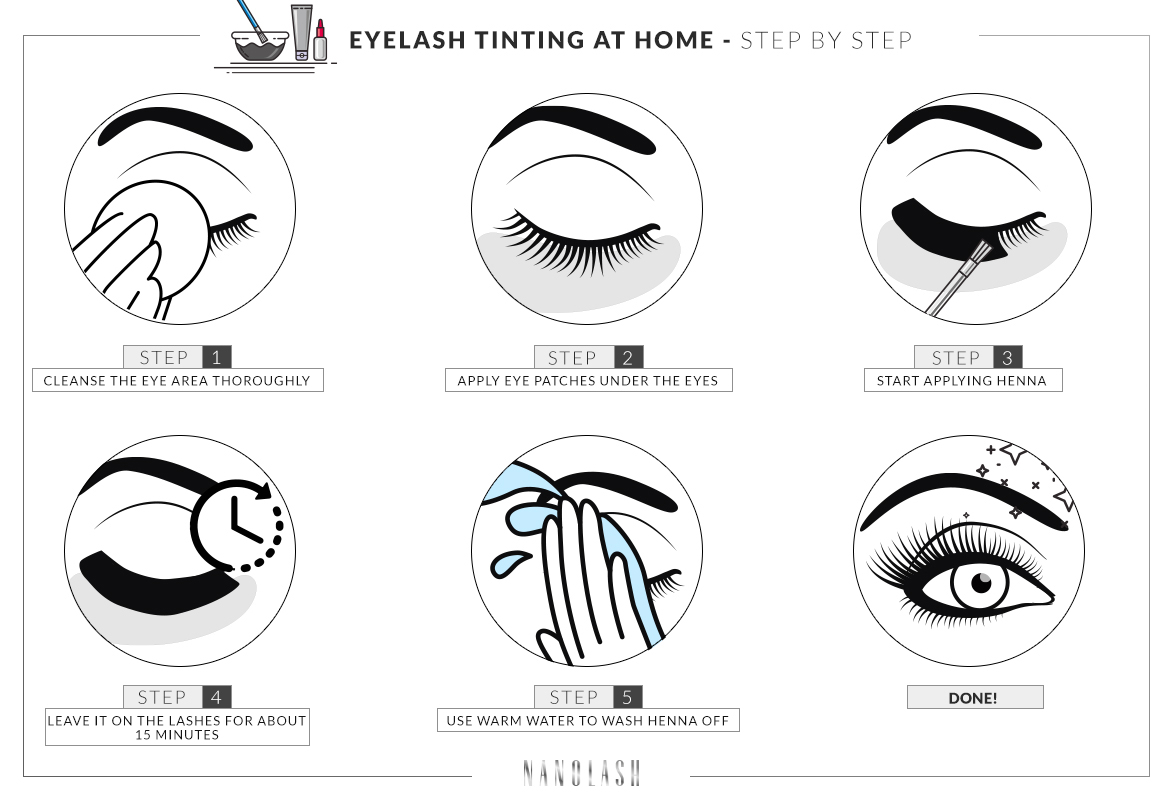
STEP 1: Prepare the henna following the manufacturer's instructions. You can use a glass for this, as well as any brush or a cotton bud. Remember to mix the ingredients well in the case of henna powder.
STEP 2: Place the previously prepared moistened cotton pad on your lower eyelid.
STEP 3: Close the eye and start applying the henna. Try to distribute the product thoroughly on all the lashes.
STEP 4: Leave the henna on your eyelashes for about 15 minutes, make sure to follow the manufacturer's recommendation! Sometimes the recommended time is 10 minutes or 30 minutes. This makes a big difference in the tinting process.
STEP 5: Carefully wash off the henna with warm water. Try not to let it get into your eye and don't rub your eyelashes hard. Henna resembles mud in consistency and washes off easily.
You're done. After a while, move on to the other eye. To maintain the durability of the effect, it is worth avoiding wetting your lashes in excess (avoid swimming pool, long bath, sauna) for the first 24 hours.
Eyelash tinting - effects
The effects of eyelash henna can be really surprising. The lashes are thicker, darker, shiny, and moisturized. The lash line becomes visually thicker. Although lash henna may sound inconspicuous, it really emphasizes the gaze and gives it definition, and you can forget about using mascara for a while.
Eyelash tint may not thicken the lashes, but it makes the lash line look thicker by deepening the lash color, making the eye frame sharper.
Eyelash tinting - how long does it last?
The lash tinting effects usually last about 3 weeks. Due to the natural lifespan of eyelashes which are bound to fall out at some point, you can safely repeat lash tinting after a month. The effect fades slowly and very naturally, so you don't have to worry about your lashes starting to look worse after a while. You can confidently apply mascara or curl them with an eyelash curler, it will not affect the results.
Eyelash tinting - aftercare
Tinted eyelashes do not require additional aftercare but it won't hurt either. If you want to continue to improve the condition of your lashes further, reach for Nanolash eyelash serum and apply it at the lash line. Oils tend to wash the henna out of the lashes so you may shorten the lifespan of your tinting.
Also, remember to treat your eyelashes gently when removing your makeup. Friction is never good for them.
Eyelash tinting - are there any contraindications?
Although henna is a natural dye and does not contain ammonia, it can affect our bodies. Always pay attention to the product's formula and check if there are any allergenic ingredients in it.
Remember never to use henna on freshly laminated eyelashes or on top of eyelash lift or botox! These types of treatment involve applying chemical products on the lashes. Henna could severely dry them out. Always listen to the recommendations of your lash artist.
Tinting eyelashes with henna or lash tint is also not recommended during an ongoing eye infection or any inflammation, so as not to aggravate the condition.
Eyelash tinting during lash lift and lamination
After eyelash lift and lamination, it's best to give your lashes some time to rest. As we mentioned earlier, during these treatments, the lashes are subjected to chemical processes that in no way cooperate with herbal tinting. On the contrary, the chemically-treated lashes need hydration.
Tinting is not completely out of the question though. When performing eyelash lift and lamination, eyelash artists often offer tinting at the same time. This is where eyelash tint is most often used. Although the lift and lamination itself have a very nourishing and thickening effect on the lashes, additional tinting with a well-selected shade can boost the effects perfectly.
Lash lift and lamination at home
For some time now, lash lift and lamination at home has been possible and affordable. A few manufacturers tried to meet the needs of their customers and created special lash lift kits. They can be used, of course, by professionals, but are also suitable for performing the treatment yourself. These kits come with clear and simple step-by-step instructions, which certainly make it easier to operate. For more on at-home eyelash lift and lamination, check out this post.
NOTE: Not all kits include eyelash tint, so it's a good idea to buy it in advance.